
3D-printers are great, you can print toys, tools or pretty much anything you can build in a 3D modeling software. But you know what’s even better than a 3D-printer that can turn filament into models? Correct! A 3D printer that can draw 2D Images… I know a printer for 20 bucks would probably do a better job at this, but let’s be honest. Was owning a 3D-printer ever really about doing useful stuff? No, so let’s make a pen plotter!
Attaching a pen to your printer:
Obviously, if you want to draw using your printer, you need to find a way to attach your pen to it. Really anything goes here, as long as your pen is more or less secure. Some people simply use rubber bands, I was personally able to simply repurpose the clamp that usually holds my extruder.

Creating an Image to draw:
Now that our pen is attached to the printer, we can get to the interesting part. We will need an svg, that we can later use to generate gcode. I will use Inkscape for creating the file, but generally speaking, any SVG editor will work. Once you’ve created a new document, go to “Files > Document Settings”.
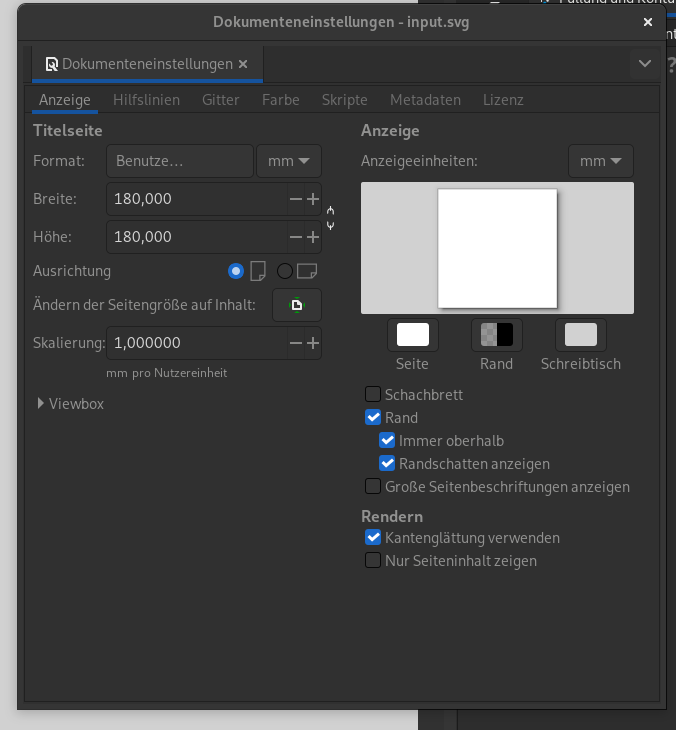
Change the unit used for scaling to millimeters and set the width and height of the document a few centimeters smaller than the size of your print bed.
You may now get creative and make some art, or download some from freesvg.org. Make sure to convert objects like text to paths by clicking “paths > convert object to path” at the top of the program. Save your file and proceed to the next step.
Generating G-code:
Going into this project, I thought that this will be the easiest part of the process… boy was I wrong. While there are different tools out there to convert svg’s to gcode, none worked in a reliable manner for me. That’s why I decided to bodge together a script that simplifies the process. Download the files from my Git: EasySVG2GCODE and extract them to a new folder.
Make sure you have python and pip installed before you proceed. EasySVG2GCODE requires svg2gcode to be installed via pip:
pip install svg2gcodeYou can now open EasySVG2GCODE.py and edit the following values to fit your machine:
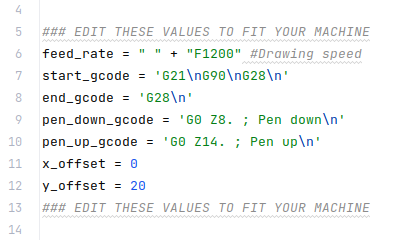
Most importantly, you need to set the correct Z values for pen_up and pen_down. The latter being the height at which your pen draws on the paper. You may also configure an offset for x and y as coordinate values to properly position your drawing. Save the file and exit the editor.
Last but not least, place your svg in the “Input” folder (delete existing files) open a terminal and go to the directory that EasySVG2GCODE is located in and run:
python EasySVG2GCODE.pyYou will now find an “output.gcode” file in the same folder. I recommend double checking it using gcode-viewer.com.
Start drawing with your printer:
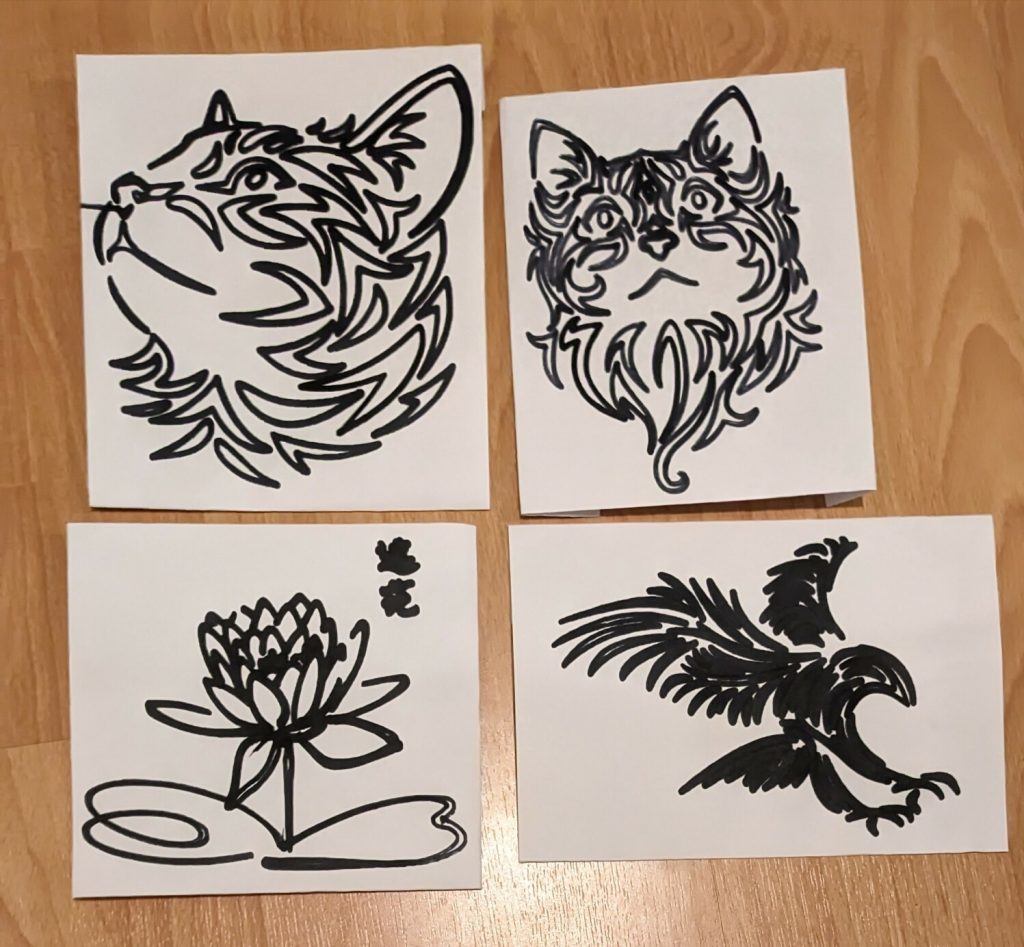
Congratulations! Now send the gcode to your machine and start drawing. You successfully downgraded your 3D-printer to be a 2D-Printer. Now go have fun with your new pen plotter.
If you liked this post, consider following me on Mastodon.